Understanding Basic Rules And DB Configuration Steps in pega
Understanding the basic rules of Pega is crucial for developing effective Pega applications.
FYI : Ignore , Reading RED COLOR sentence for now .
Below are some basic rules in PEGA that were created under the work class.
Property, Section, Flow Action, Flow.
1.Property:

A property in Pega is similar to a variable in other programming languages; it holds values, is associated with a name, a property type (such as text, decimal, or date), and a control.
- This is an instance of Class Rule—Object—Property.
- This can be created under the data model category.
- To create a property, follow the below navigation.
4. Table Type: Optional, to define the label values of radio buttons, dropdowns, etc.
2.Section:
Section is an HTML rule used to design the user interface.
- This is an instance of the class Rule-HTML-Section.
- You can create this under the User Interface category. Click on it.
- Under the work class, under create, under user interface, section.
- A section is going to hold different controls in its layout. Specifically, the layout is like a table element in HTML, which, consequently, can be used to align the controls.
3.Flow Action:
It’s a container of Section that adds an action to the UI like submit, save, cancel, etc.
- This is an instance of a class rule-object-flow action.
- You can create flow actions under the Process category.
- Under the work class, under Create, under Process, Flow Action,.
- Flow action is like a container of sections.
- The section we have created should be added to the flow of action.
- A flow action allows a user to perform an action like submit, save, cancel, etc.
- A flow action can be integrated into the flow by using the assignment shape’s outward connector.
4.Flow or Work Flow:
Flow defines the transaction life cycle.
- This is an instance of the class Rule-Obj-Flow.
- A work flow is the heart of PRPC transaction processing.
- We design any transaction processing using a workflow. Thus, the workflow serves as the backbone for managing transactions effectively.
- Under the work class, under create, under process, Flow.
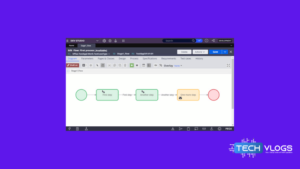
Below, the basic flow shapes are created.
- Start: This flow shape initiates a transaction.
- Assignment: We use this flow shape to call a flow action into the flow.
- End Shape: This flow shape resolves a transaction.
A flow must have one and only one start shape, and it can have at least one end shape.
Follow the below steps to create the UI and make it part of the workflow.
- Identify and create all the required properties.
-
To create a UI by section rule, begin by dragging and dropping properties into the layout of section.
-
To create a flow action, initially, define the flow action. Subsequently, include a section in the flow action.
- To create a flow, first, use the assignment shape. Then, call the flow action into the flow by using the assignment shape’s out-of-box connector.
- To make the flow executable, choose the option “Creates a new work object,” and then execute the flow.
DB Configuration Steps
Before you pen the pgAdmin4 environment, ensure your server is up and you log in to PRPC.
Go to the folder where you have installed Pega.
D:\PRPCPersonalEdition\pgsql\pgAdmin 4\bin
-
To create a shortcut on the desktop for ease of access, simply right-click on the desired file or program, then select “Create shortcut.”
- Double-click an issue like this and subsequently follow the below steps.
-
Instead of Googling the issues and then clicking on the Microsoft link, actively search for the issues and then follow the Microsoft link.
Click on download.
Select, as shown below.
Next
It’s going to download an exe file…
Now
If there is no DLL issue, proceed from here.
Click on Add New Server.
Password is Postgres (all lower case).
Click on Save.
If there is any error,
- Make sure your Pega server is up and running.
- Please type port 5433 instead of 5432 and save. It will work.
-
Now, as a result, you see the server added in the left panel.
- Expand servers and local hosts.
- Navigate as shown in the below screen shot until tables
- The above is our work table. Here,
-
To see the data, right-click on the table name initially.
Done.
Conclusion
Understanding these basic rules in Pega enables you to build and manage robust Pega applications. Each rule serves a specific purpose and, consequently, enables you to effectively model business processes, data structures, user interfaces, and business logic.
rules in pega
For more topics on pega


1 thought on “Understanding Basic Rules And DB Configuration Steps in Pega”